yetone 的 macOS 新环境配置指南
- Dominant language
- No language data
- Stars
- 7
- Forks
- 0
- PR merge metrics
- No merged PRs in 30d
Description
## Chrome
### 下载
wall 内下载:
https://www.google.cn/intl/zh-CN_ALL/chrome/
## SS
### 下载
wall 内下载:
https://github.com/qinyuhang/ShadowsocksX-NG-R/releases
## 字体
### 下载
https://github.com/be5invis/Sarasa-Gothic/releases
## iTerm2
### 下载
https://www.iterm2.com/
### profile
option 为标准的 alt 键,可以在 terminal 里舒适地用 readline emacs-mode 下的 alt - f、alt - b、alt - . 了
https://gist.github.com/yetone/879195017c247eeaa765c87e926b2b41
## Homebrew
### 安装
```bash
/usr/bin/ruby -e "$(curl -fsSL https://raw.githubusercontent.com/Homebrew/install/master/install)"
```
### 配置国内源
formula 索引的镜像:
```bash
cd "$(brew --repo)"
git remote set-url origin https://mirrors.tuna.tsinghua.edu.cn/git/homebrew/brew.git
cd "$(brew --repo)/Library/Taps/homebrew/homebrew-core"
git remote set-url origin https://mirrors.tuna.tsinghua.edu.cn/git/homebrew/homebrew-core.git
brew update
```
二进制预编译包的镜像:
```bash
export HOMEBREW_BOTTLE_DOMAIN=https://mirrors.tuna.tsinghua.edu.cn/homebrew-bottles
```
via https://mirrors.tuna.tsinghua.edu.cn/help/homebrew/
## proxychains4
命令行 fq 用
### 安装
```bash
brew install proxychains-ng
```
### 配置
```bash
mkdir -p ~/.proxychains/
echo "socks5 127.0.0.1 1080" >> ~/.proxychains/proxychains.conf
```
## git
### 加代理
```bash
cat << EOF >> ~/.gitconfig
[http]
proxy = socks5://127.0.0.1:1080
[https]
proxy = socks5://127.0.0.1:1080
EOF
```
## zsh
### dirs
```bash
mkdir -p ~/bin
mkdir -p ~/tools
mkdir -p ~/workspace/project
mkdir -p ~/workspace/repo
mkdir -p ~/dotfile/zsh-tools
```
### oh-my-zsh
```bash
sh -c "$(curl -fsSL https://raw.githubusercontent.com/robbyrussell/oh-my-zsh/master/tools/install.sh)"
cat << EOF >> ~/.zshrc
# MY_ENV start
export MY_ENV=\$HOME/dotfile/zsh-tools/env.sh
[ -s "\$MY_ENV" ] && \\. \$MY_ENV
# MY_ENV end
EOF
. ~/.zshrc
cat << EOF >> $MY_ENV
# my binary start
export PATH="\$HOME/bin:\$PATH"
# my binary end
EOF
. ~/.zshrc
```
### GNU tools
```bash
brew install coreutils
brew install gawk
brew install gnu-sed
cat << EOF >> $MY_ENV
# GNU tools start
export PATH="/usr/local/opt/coreutils/libexec/gnubin:\$PATH"
alias awk=gawk
alias sed=ased
# GNU tools end
EOF
```
配置颜色
```bash
gdircolors --print-database > ~/.dir_colors
cat << EOF >> $MY_ENV
# ls with colors start
alias ls='ls -F --show-control-chars --color=auto'
# ls with colors end
# dircolors start
eval \`gdircolors -b \$HOME/.dir_colors\`
# dircolors end
EOF
```
### highlight
高亮你输入的命令
```bash
git clone https://github.com/zsh-users/zsh-syntax-highlighting.git ${ZSH_CUSTOM:-~/.oh-my-zsh/custom}/plugins/zsh-syntax-highlighting
# ~/.zshrc
# plugins=([plugins...] zsh-syntax-highlighting)
```
### autosuggestions
自动提示你曾经输入过的命令
```bash
git clone https://github.com/zsh-users/zsh-autosuggestions ${ZSH_CUSTOM:-~/.oh-my-zsh/custom}/plugins/zsh-autosuggestions
# change .zshrc to add plugin 'zsh-autosuggestions'
```
### z jump
用一个字母 z 来跳转到任意目录
```
# change .zshrc to add plugin 'z'
```
### spaceship
```bash
git clone https://github.com/denysdovhan/spaceship-prompt.git "$ZSH_CUSTOM/themes/spaceship-prompt"
ln -s "$ZSH_CUSTOM/themes/spaceship-prompt/spaceship.zsh-theme" "$ZSH_CUSTOM/themes/spaceship.zsh-theme"
# change .zshrc theme to 'spaceship'
```
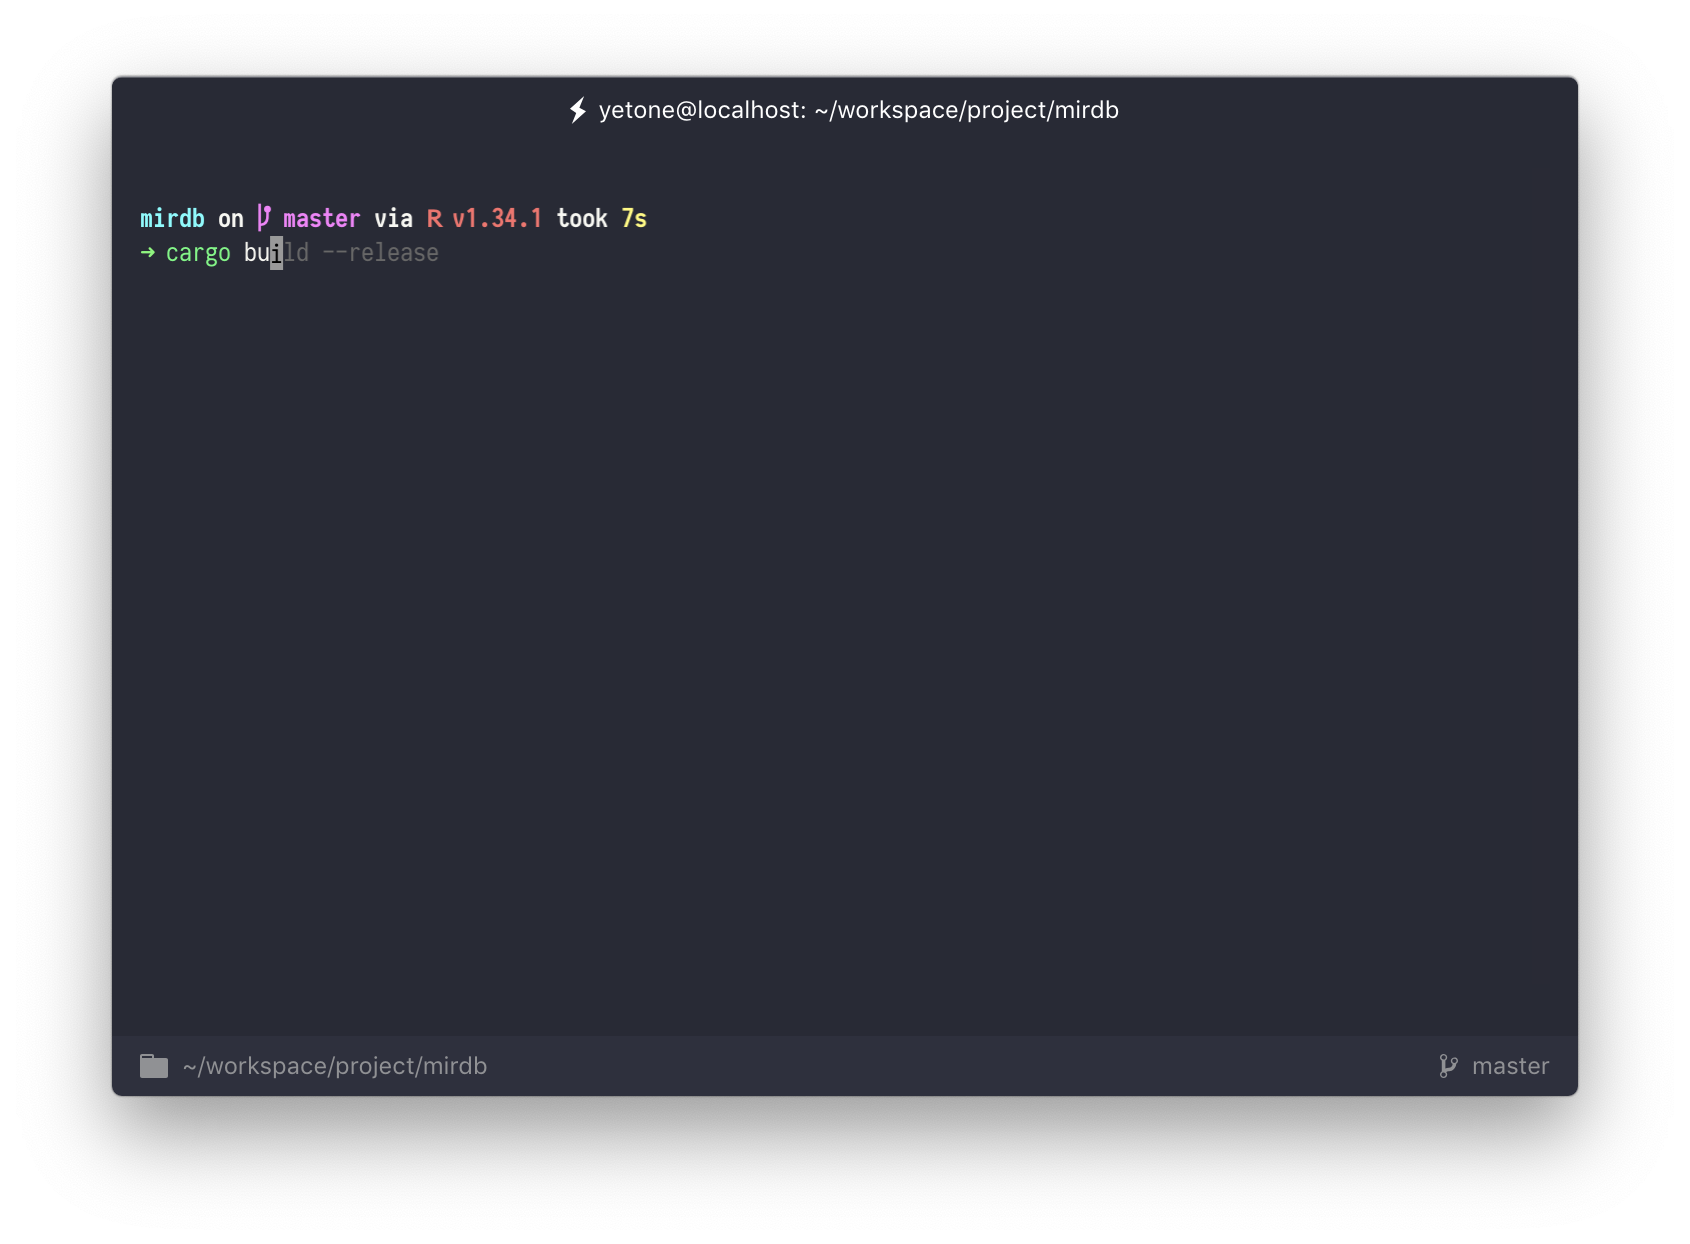
搞完这些后现在 terminal 应该看起来是这样子的了:
## readline
这个世界的起源,必备
### 安装
```bash
brew install readline
cat << EOF >> $MY_ENV
# readline start
export LDFLAGS="-L/usr/local/opt/readline/lib \$LDFLAGS"
export CPPFLAGS="-I/usr/local/opt/readline/include \$CPPFLAGS"
export PKG_CONFIG_PATH="/usr/local/opt/readline/lib/pkgconfig:\$PKG_CONFIG_PATH"
# readline end
EOF
```
## openssl
互联网世界的保姆,必备
### 安装
```bash
brew install openssl
cat << EOF >> $MY_ENV
# openssl start
export PATH="/usr/local/opt/openssl/bin:\$PATH"
export LDFLAGS="-L/usr/local/opt/openssl/lib \$LDFLAGS"
export CPPFLAGS="-I/usr/local/opt/openssl/include \$CPPFLAGS"
export PKG_CONFIG_PATH="/usr/local/opt/openssl/lib/pkgconfig:\$PKG_CONFIG_PATH"
# openssl end
EOF
```
## zlib
```bash
brew install zlib
cat << EOF >> $MY_ENV
# zlib start
export LDFLAGS="-L/usr/local/opt/zlib/lib \$LDFLAGS"
export CPPFLAGS="-I/usr/local/opt/zlib/include \$CPPFLAGS"
export PKG_CONFIG_PATH="/usr/local/opt/zlib/lib/pkgconfig:\$PKG_CONFIG_PATH"
# zlib end
EOF
```
## sqlite
```bash
brew install sqlite
cat << EOF >> $MY_ENV
# sqlite start
export PATH="/usr/local/opt/sqlite/bin:\$PATH"
export LDFLAGS="-L/usr/local/opt/sqlite/lib \$LDFLAGS"
export CPPFLAGS="-I/usr/local/opt/sqlite/include \$CPPFLAGS"
export PKG_CONFIG_PATH="/usr/local/opt/sqlite/lib/pkgconfig:\$PKG_CONFIG_PATH"
# sqlite end
EOF
```
## pyenv + Python
### 安装
```bash
brew install pyenv
cat << EOF >> $MY_ENV
# pyenv start
export PYENV_ROOT="\$HOME/.pyenv"
export PATH="\$PYENV_ROOT/bin:\$PATH"
if command -v pyenv 1>/dev/null 2>&1; then
eval "\$(pyenv init -)"
eval "\$(pyenv virtualenv-init -)"
fi
# pyenv end
EOF
git clone https://github.com/pyenv/pyenv-virtualenv.git $(pyenv root)/plugins/pyenv-virtualenv
. ~/.zshrc
CFLAGS="-I$(xcrun --show-sdk-path)/usr/include" pyenv install 3.7.3
pyenv global 3.7.3
```
### 换 pip 源
```bash
mkdir -p ~/.pip
cat << EOF > ~/.pip/pip.conf
[global]
index-url = https://pypi.doubanio.com/simple/
[install]
trusted-host=pypi.doubanio.com
EOF
```
## pipsi
### 安装
```bash
pip install pipsi
cat << EOF >> $MY_ENV
# pipsi start
export PATH=\$HOME/.local/bin:\$PATH
# pipsi end
EOF
pipsi install wakatime flake8 pylint
```
## Rust
### 安装
```bash
curl https://sh.rustup.rs -sSf | sh
rustup toolchain add nightly
rustup default nightly
rustup component add rust-src rustfmt
cat << EOF >> $MY_ENV
# rust start
source \$HOME/.cargo/env
export RUST_SRC_PATH="\$(rustc --print sysroot)/lib/rustlib/src/rust/src"
# rust end
EOF
source ~/.zshrc
```
### 换 cargo 源
```bash
mkdir -p ~/.cargo
cat << EOF > ~/.cargo/config
[source.crates-io]
registry = "https://github.com/rust-lang/crates.io-index"
replace-with = 'ustc'
[source.ustc]
registry = "git://mirrors.ustc.edu.cn/crates.io-index"
EOF
```
## Go
```bash
brew install go
cat << EOF >> $MY_ENV
# go start
export GOPATH=\$HOME/workspace/project/go
export PATH="\$GOPATH/bin:$PATH"
# go end
EOF
. ~/.zshrc
go get -u -v github.com/mdempsky/gocode
go get -u -v github.com/rogpeppe/godef
go get -u -v golang.org/x/tools/cmd/guru
go get -u -v golang.org/x/tools/cmd/gorename
go get -u -v golang.org/x/tools/cmd/goimports
go get -u -v golang.org/x/tools/cmd/godoc
go get -u -v github.com/zmb3/gogetdoc
go get -u -v github.com/cweill/gotests/...
go get -u github.com/haya14busa/gopkgs/cmd/gopkgs
go get -u -v github.com/davidrjenni/reftools/cmd/fillstruct
go get -u github.com/josharian/impl
```
## NVM
### 安装
```bash
curl -o- https://raw.githubusercontent.com/creationix/nvm/v0.34.0/install.sh | bash
cat << EOF >> $MY_ENV
# nvm start
export NVM_DIR="\$HOME/.nvm"
[ -s "\$NVM_DIR/nvm.sh" ] && \\. "\$NVM_DIR/nvm.sh" # This loads nvm
[ -s "\$NVM_DIR/bash_completion" ] && \\. "\$NVM_DIR/bash_completion" # This loads nvm bash_completion
# nvm end
EOF
. ~/.zshrc
nvm install node
nvm use node
```
### 换 npm 源
```bash
cat << EOF > ~/.npmrc
registry=https://registry.npm.taobao.org
EOF
```
## spacemacs
### 安装
```bash
brew tap d12frosted/emacs-plus
brew install emacs-plus
ln -s /usr/local/Cellar/emacs-plus/*/Emacs.app/ /Applications/
ln -s ~/dotfile/.spacemacs.3 ~/.spacemacs
git clone -b develop https://github.com/syl20bnr/spacemacs ~/.emacs.d
```
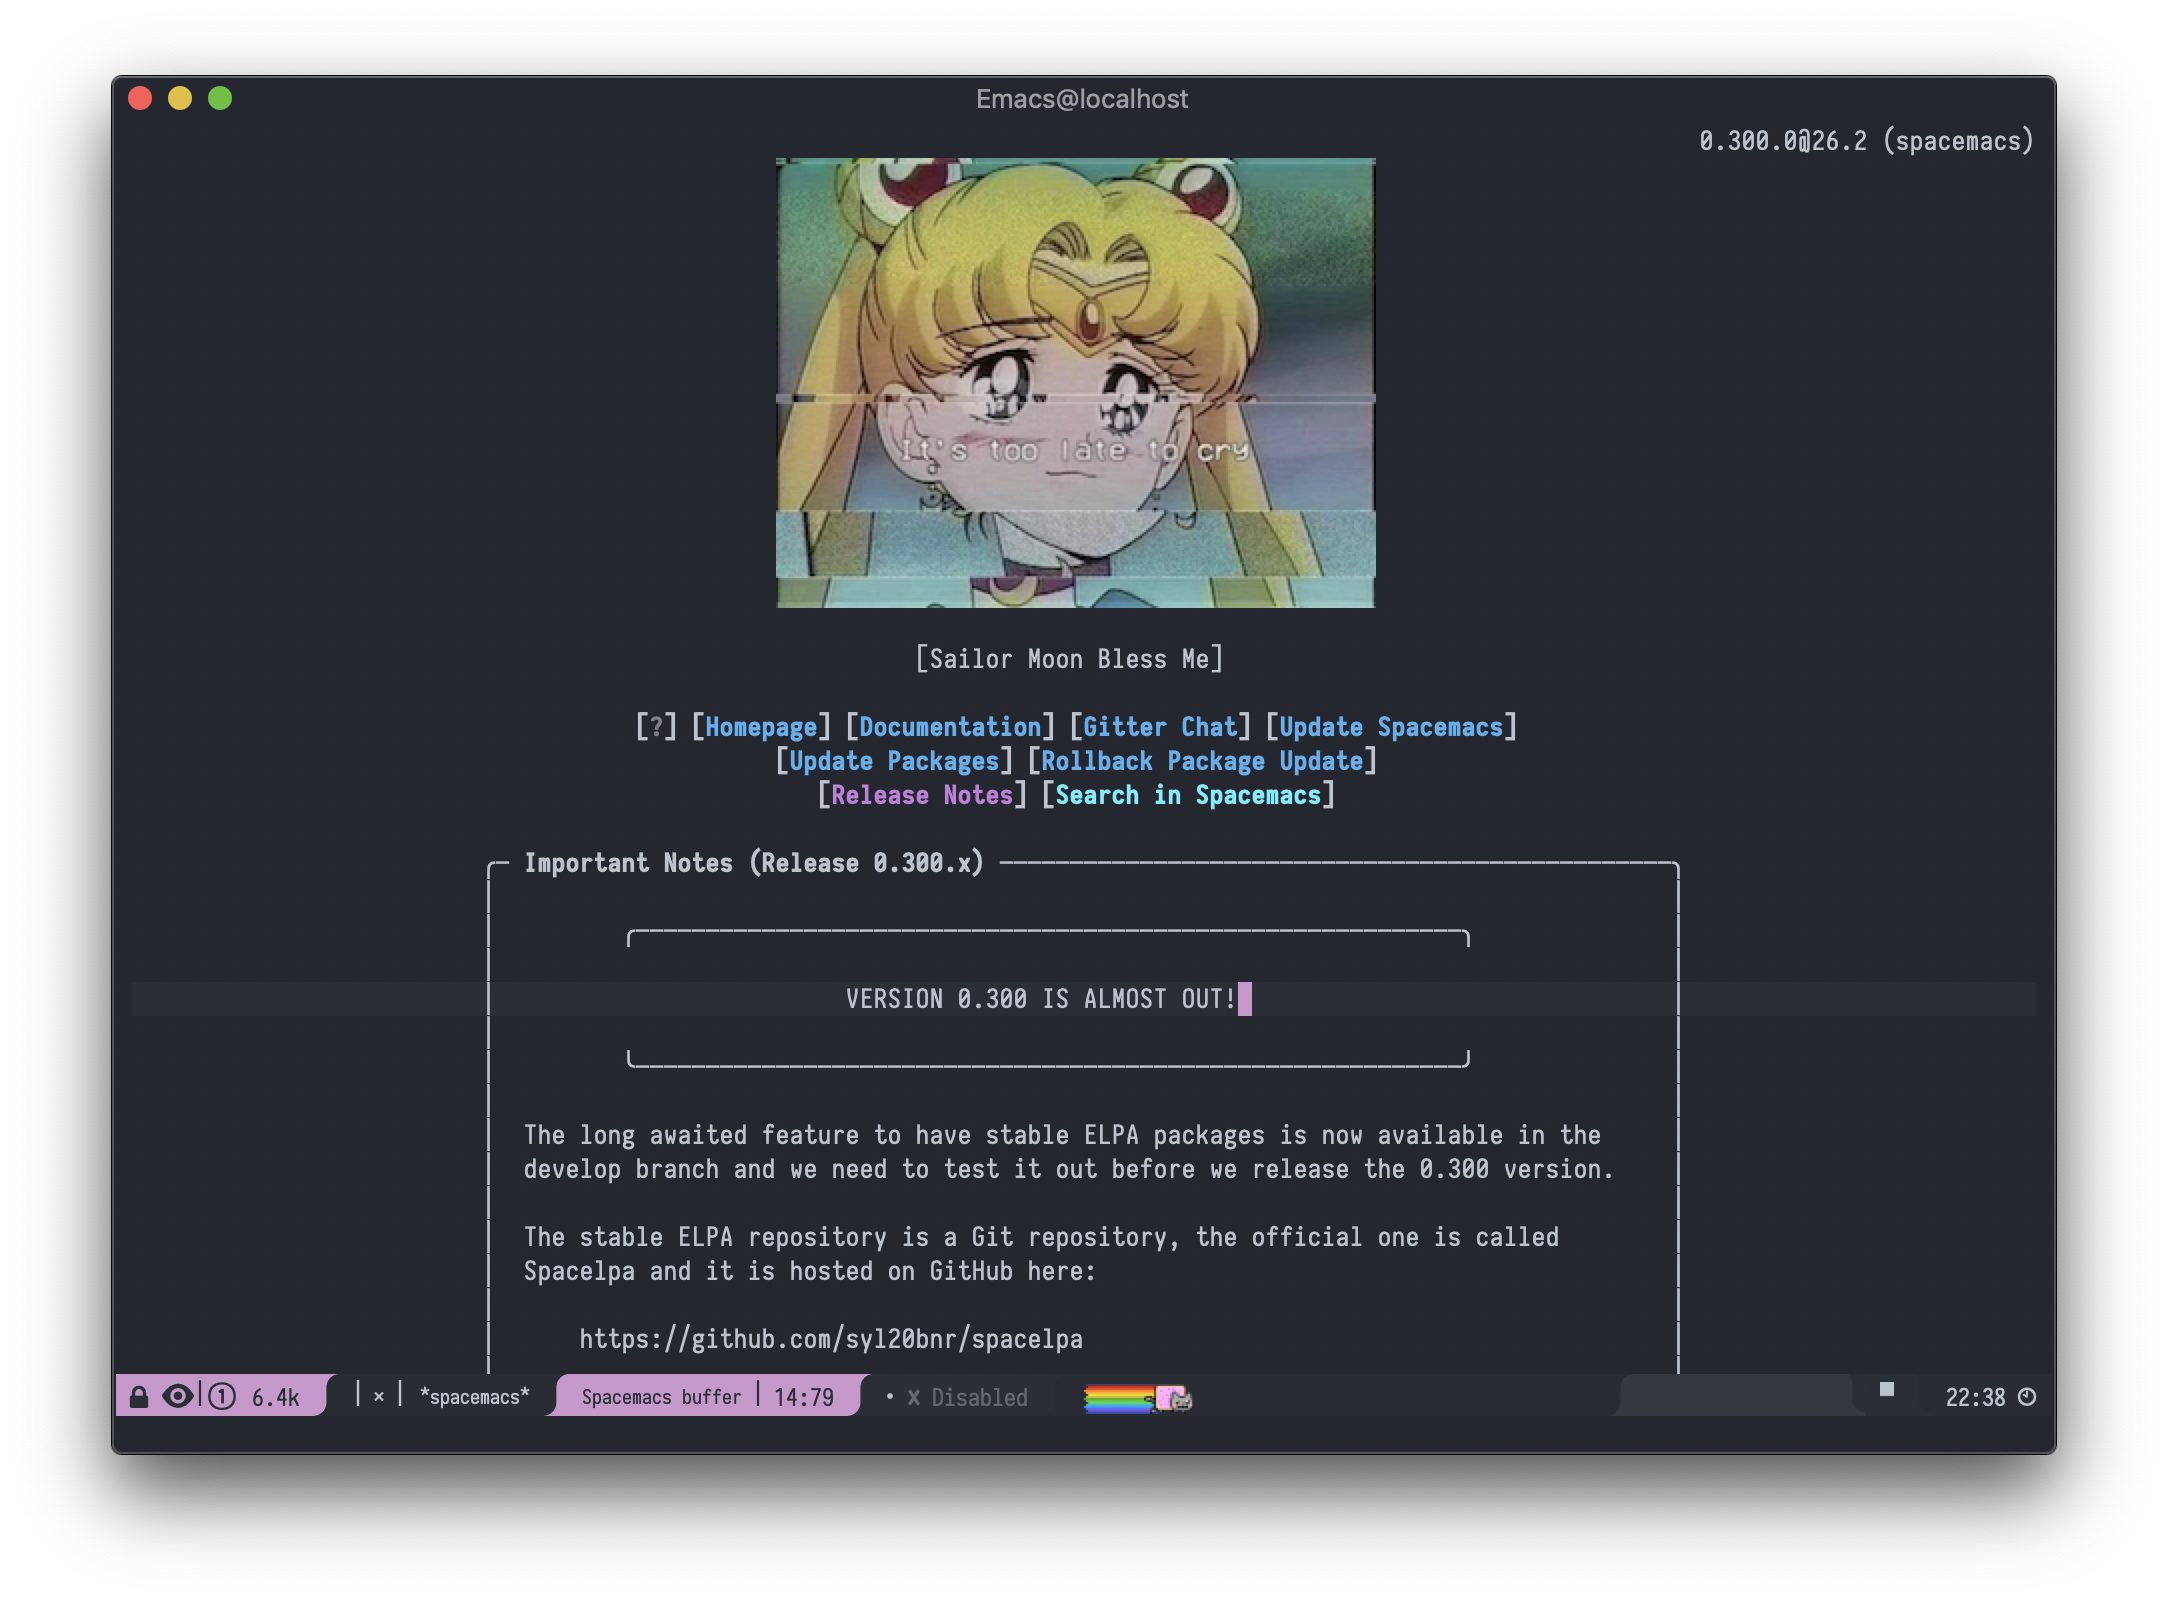
效果图
## skim
### 安装
```bash
brew install sk
```
### key binding 配置
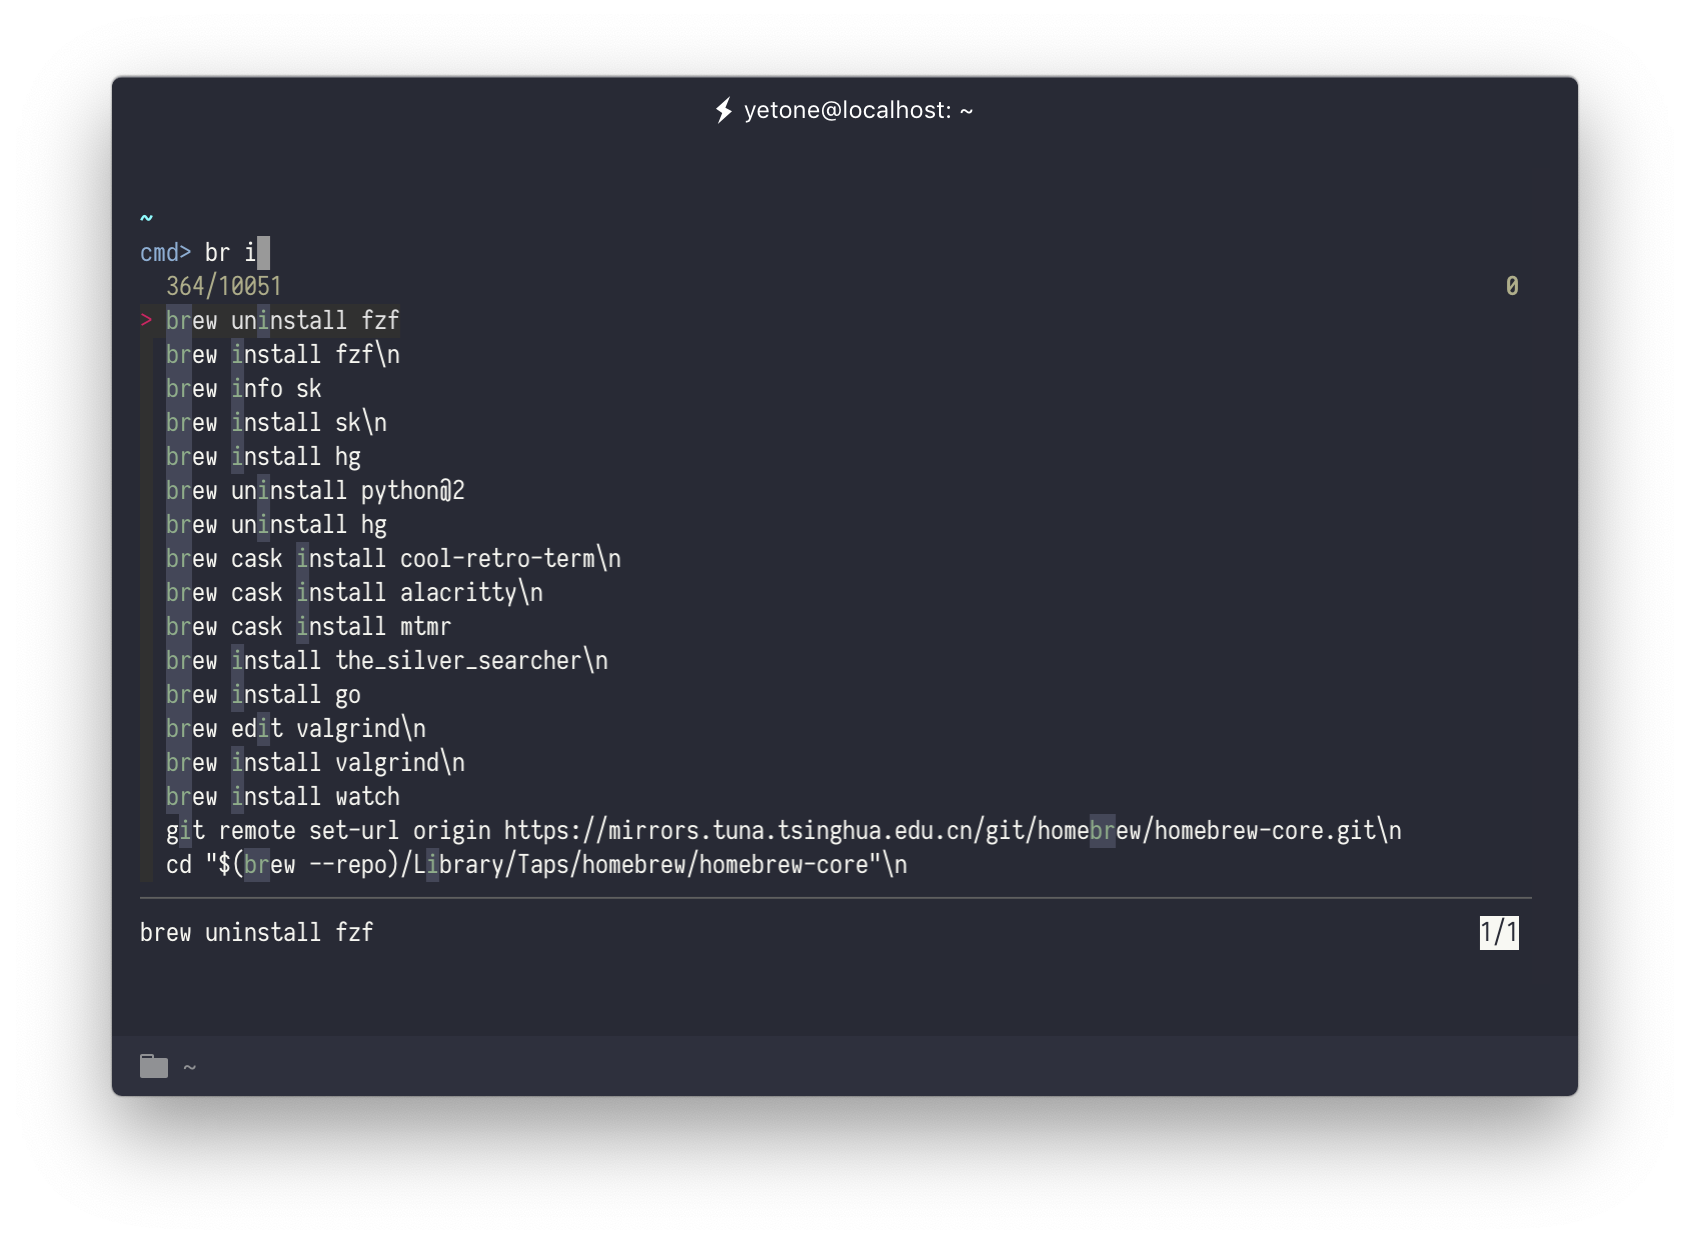
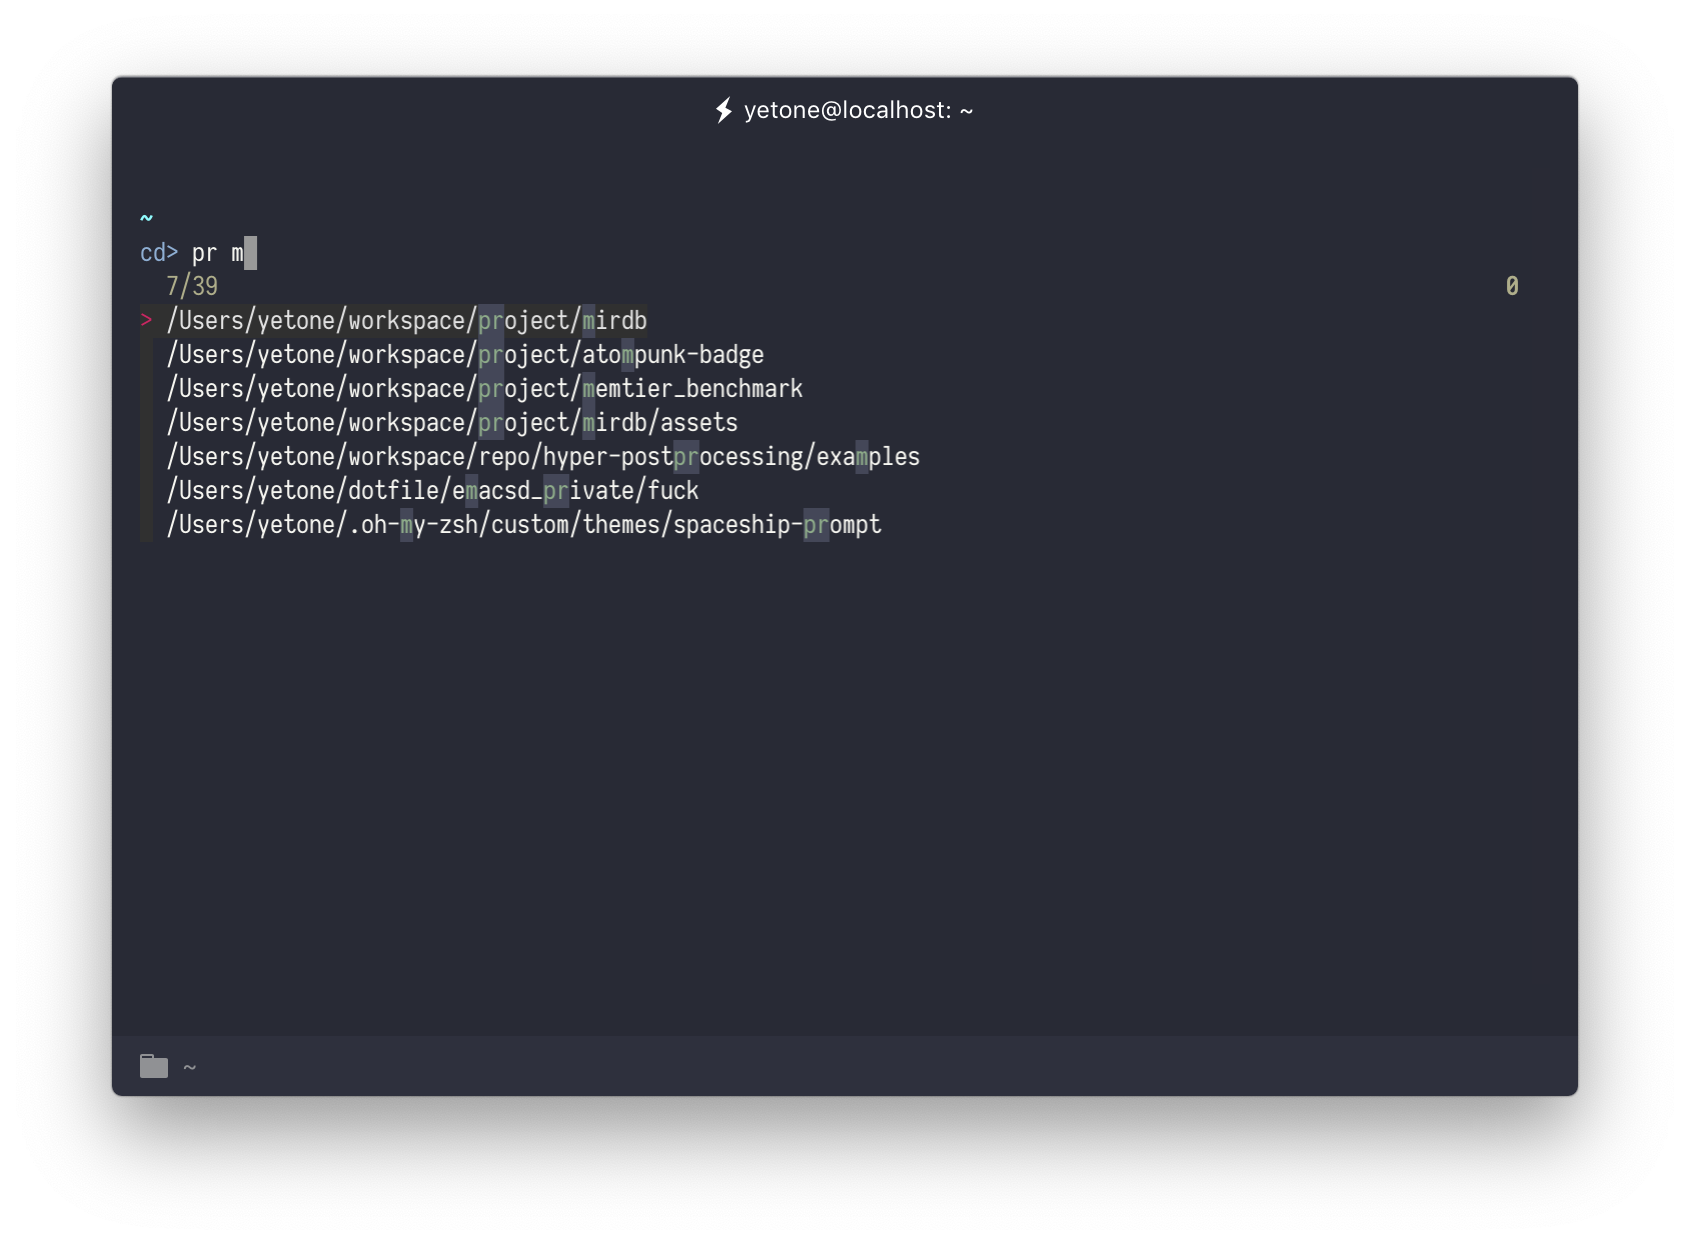
替换 readline 默认 emacs mode 中的 backward-interactive-search(ctrl - r) 和 forward_interactive-search(ctrl - s)的 key binding
在 dotfile 里的 env.sh 里已经 source 了这个配置,可以忽略这一步,这里只作为说明
https://gist.github.com/yetone/bb3cfcc6db8756d7440045e6a89955b6
效果图:
ctrl - r(交互式快速搜索历史记录):
ctrl - s(交互式快速目录跳转,依赖于上面的 z jump):
## ripgrep
### 安装
```bash
brew install ripgrep
```
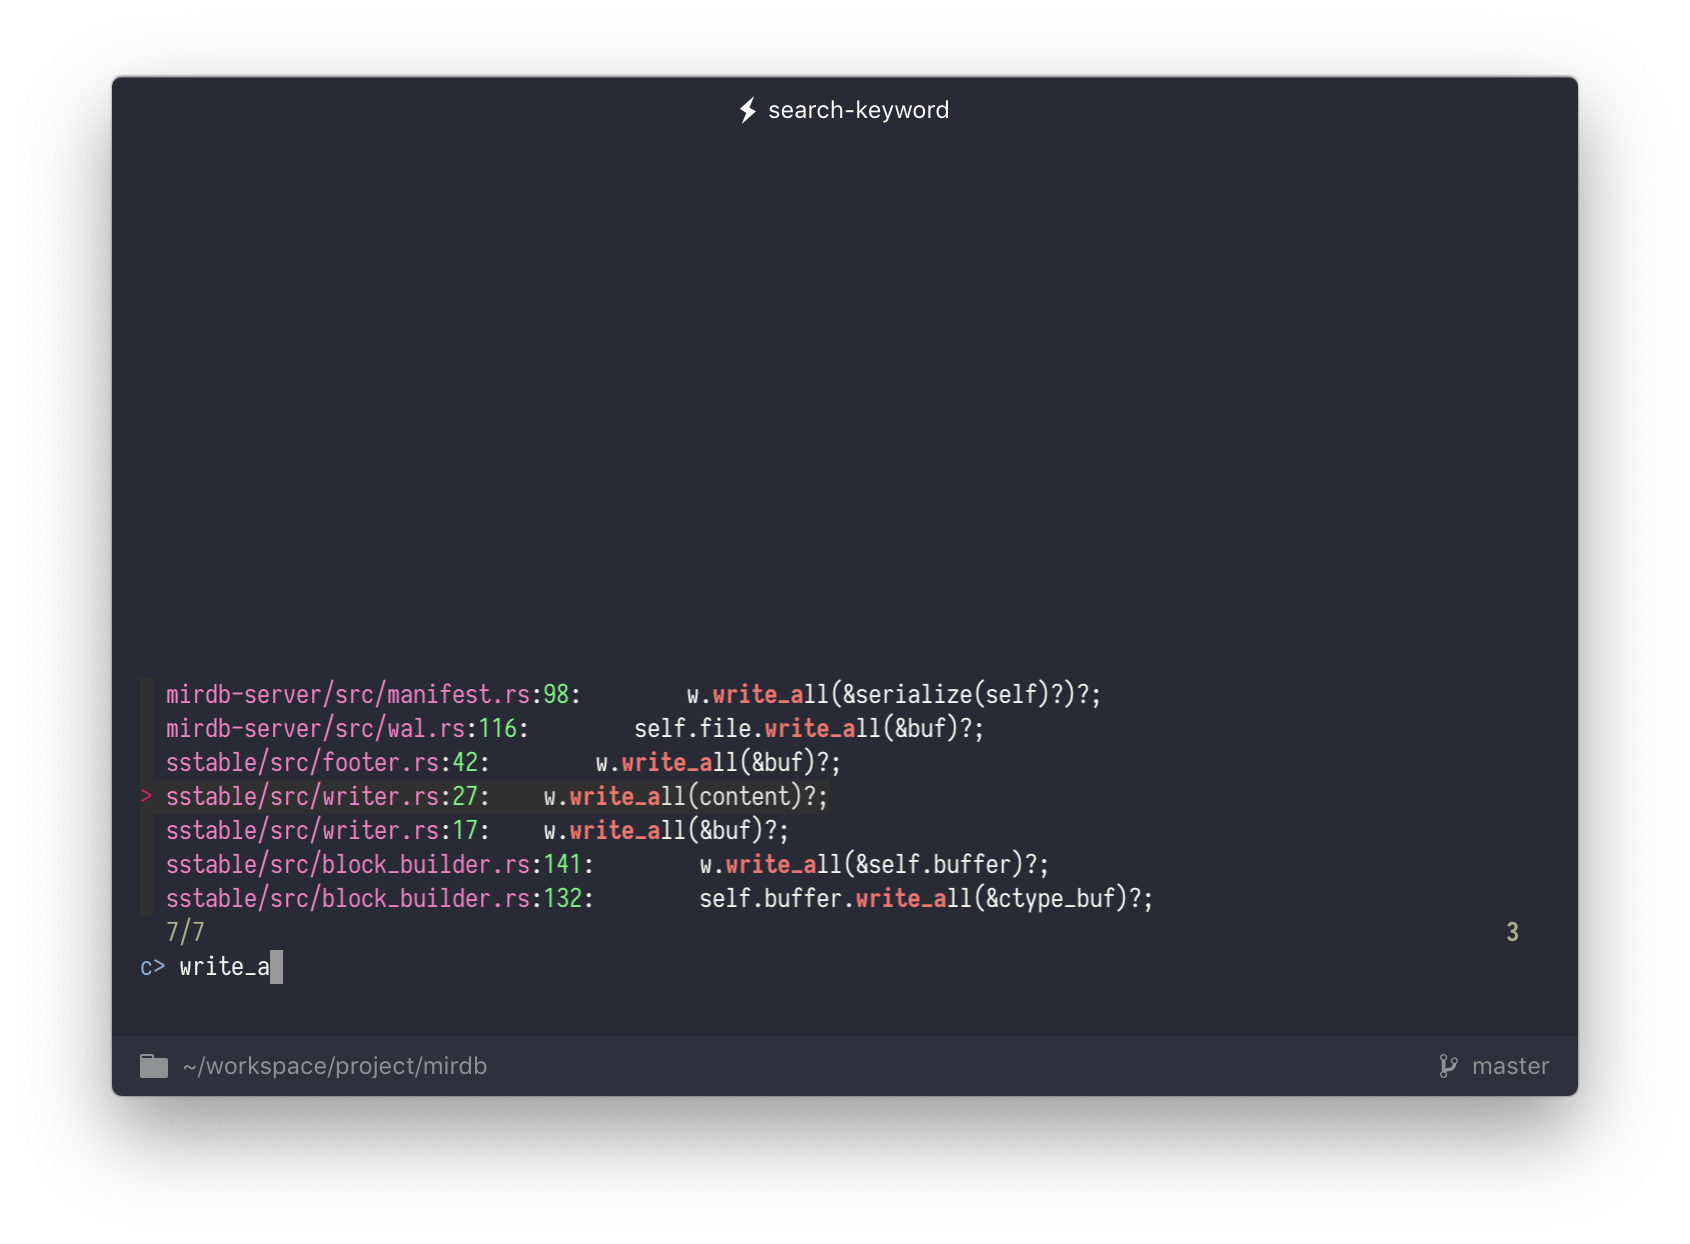
### 交互式搜索目录下的所有文件中的关键字的 alias(好拗口 =。=)
env.sh 中已有,这里只作为说明
```bash
cat << EOF >> $MY_ENV
# search keyword start
search-keyword() {
sk --ansi -i -c 'rg --color=always --line-number "{}" '\$1
}
alias s=search-keyword
# search keyword end
EOF
```
效果图:
## exa
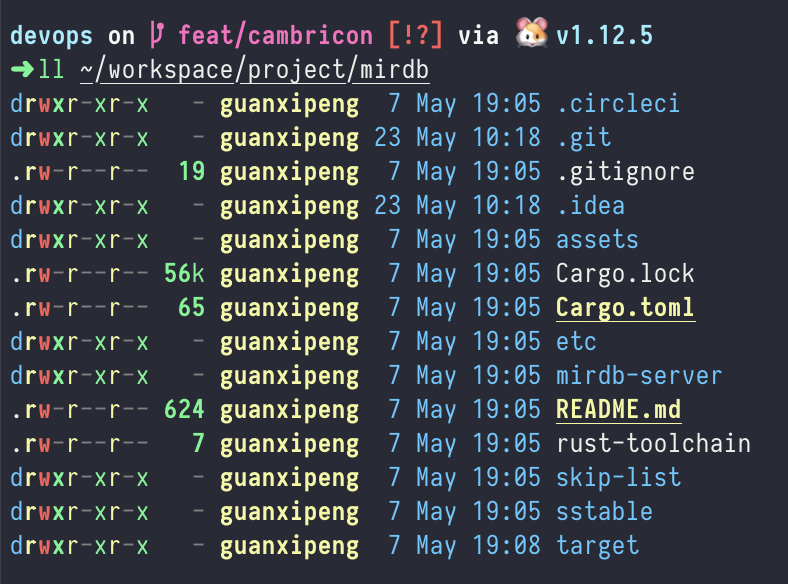
替换 ls
### 安装
```bash
brew install exa
cat << EOF >> $MY_ENV
# exa start
alias ls=exa
alias ll='exa -al'
# exa end
EOF
```
效果图:
## Karabiner
### 下载 + 安装
https://pqrs.org/osx/karabiner/
### 配置
* 把 left shift 改成中英文输入法切换:
> 为什么不用原生的 capslock 切换中英文呢?因为这个占用面积特大又功能单一又使用不频繁的按键的存在完全破坏了我内心世界的秩序,所以作为一个 vim + emacs 党(其实我最常用的是 emacs + evil),我把 capslock 映射成了 ctrl 键,以维持内心世界的秩序。
https://gist.github.com/yetone/b29b79b16fb8fec16dbbdc7f39702352
```bash
curl -o ~/.config/karabiner/karabiner.json https://gist.githubusercontent.com/yetone/bfce95f3ba46fe9e8f1c4d2caa3c5c09/raw/43ee8ff0385e5296131302f656fe0be9cb345ad9/karabiner.json
```
## docker
### 下载 + 安装
https://docs.docker.com/v17.12/docker-for-mac/install/#download-docker-for-mac
### 换源
```bash
mkdir -p ~/.docker
cat << EOF > ~/.docker/config.json
{
"credSstore" : "osxkeychain",
"auths" : {
"https://index.docker.io/v1/" : {
}
},
"stackOrchestrator" : "swarm"
}
EOF
```
## tldr
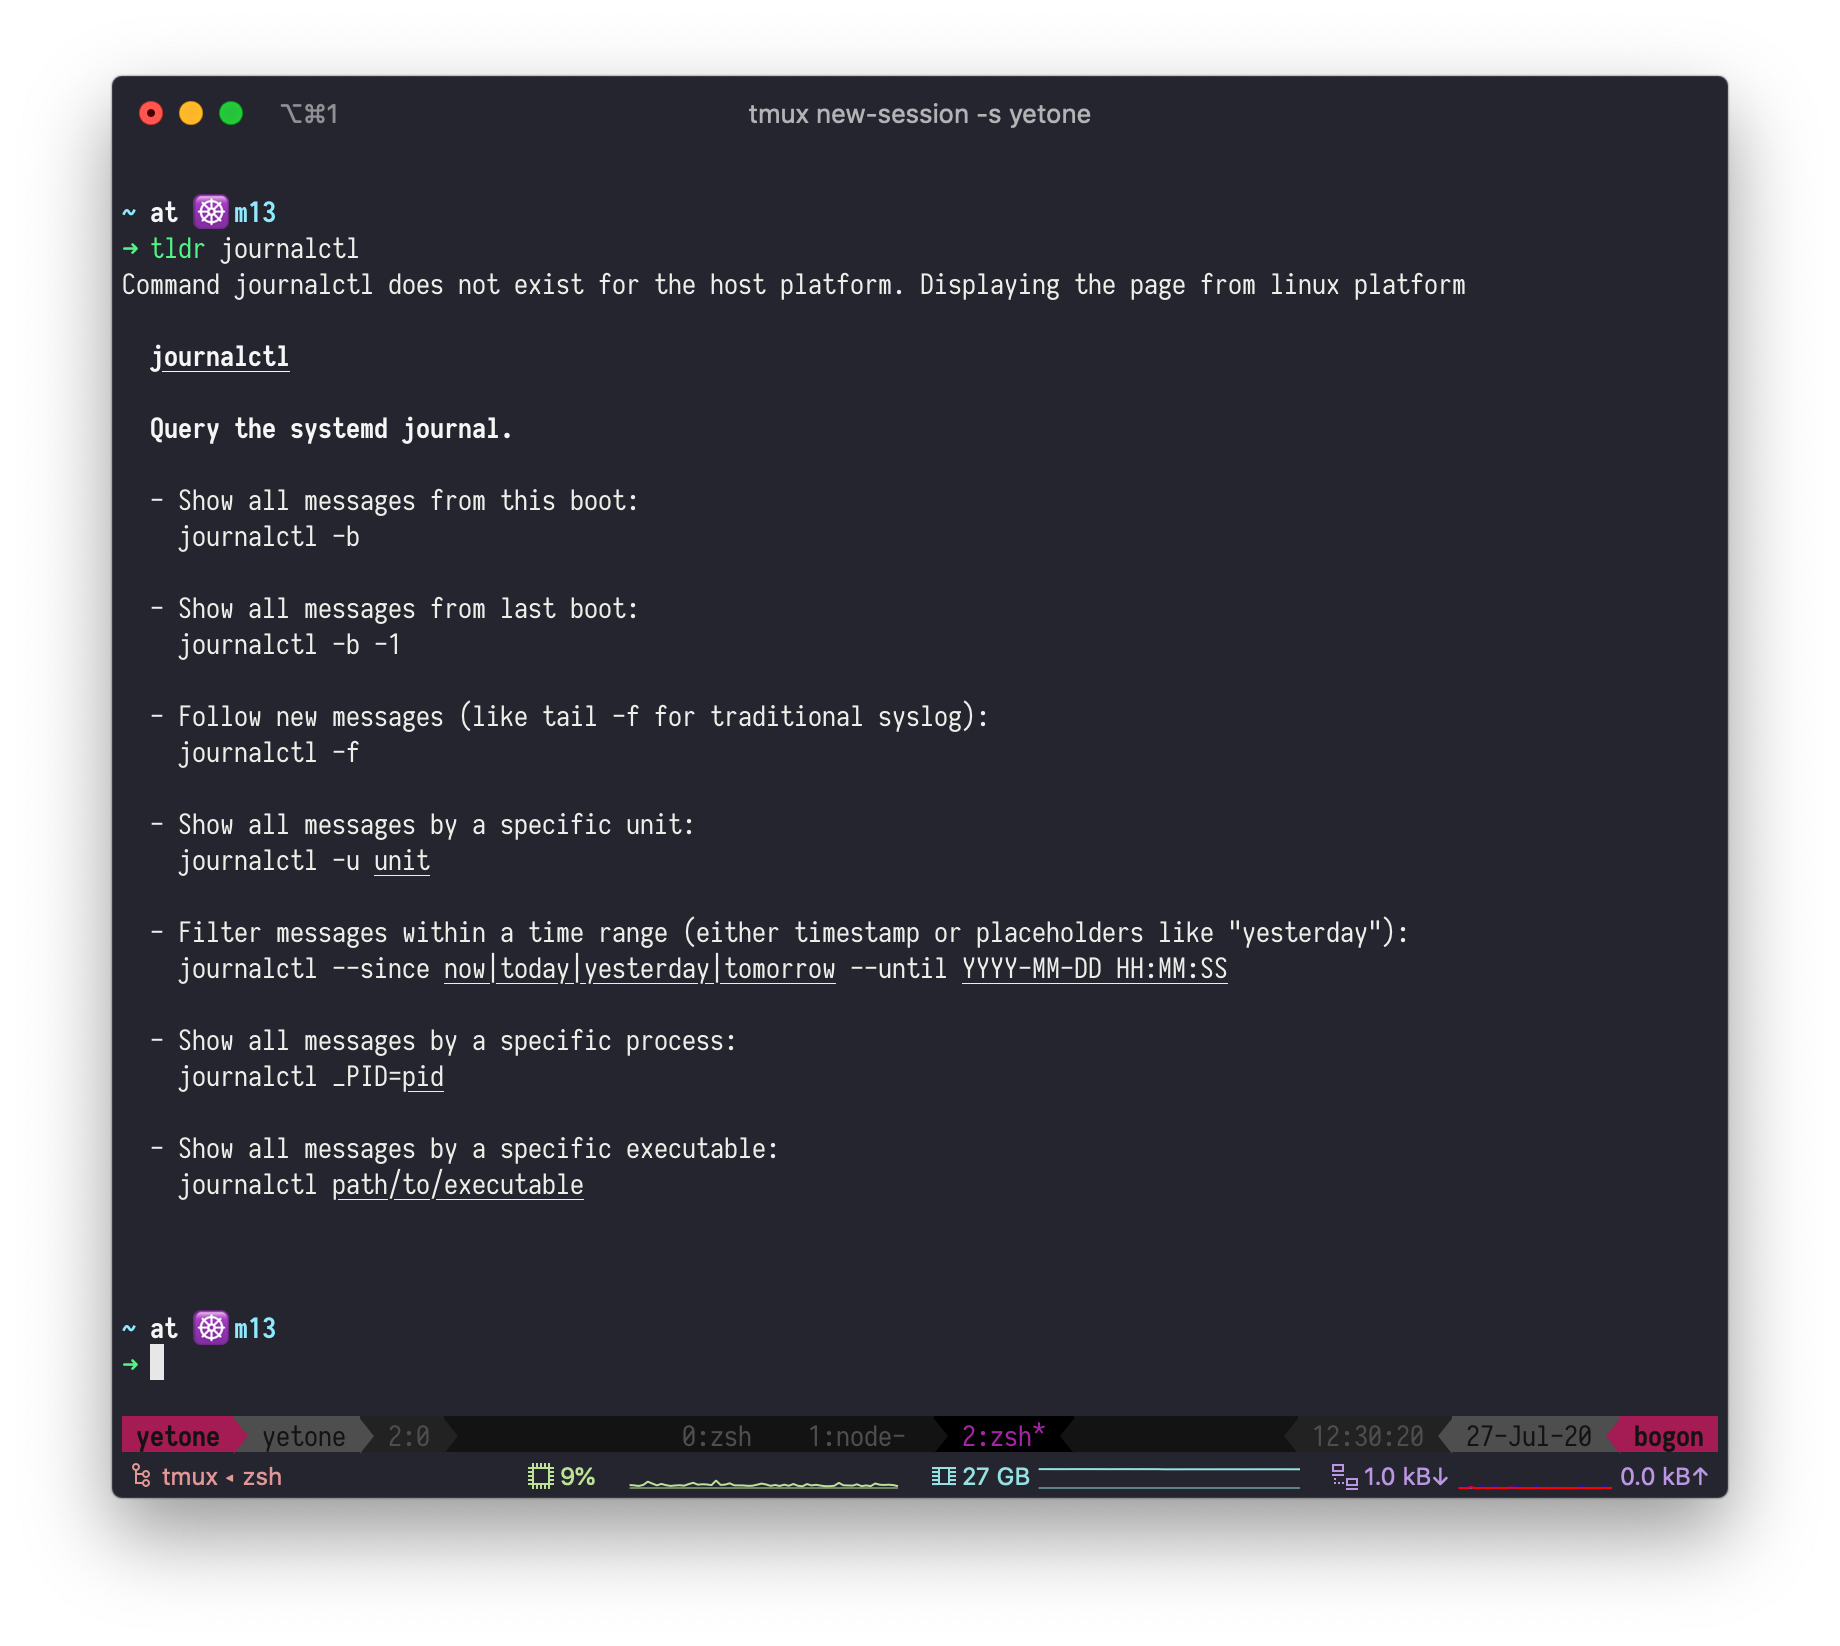
如果你记不住某个命令怎么用了,可以用它用一句话给你举个例子
```bash
npm install -g tldr
```
效果图:
## cheat
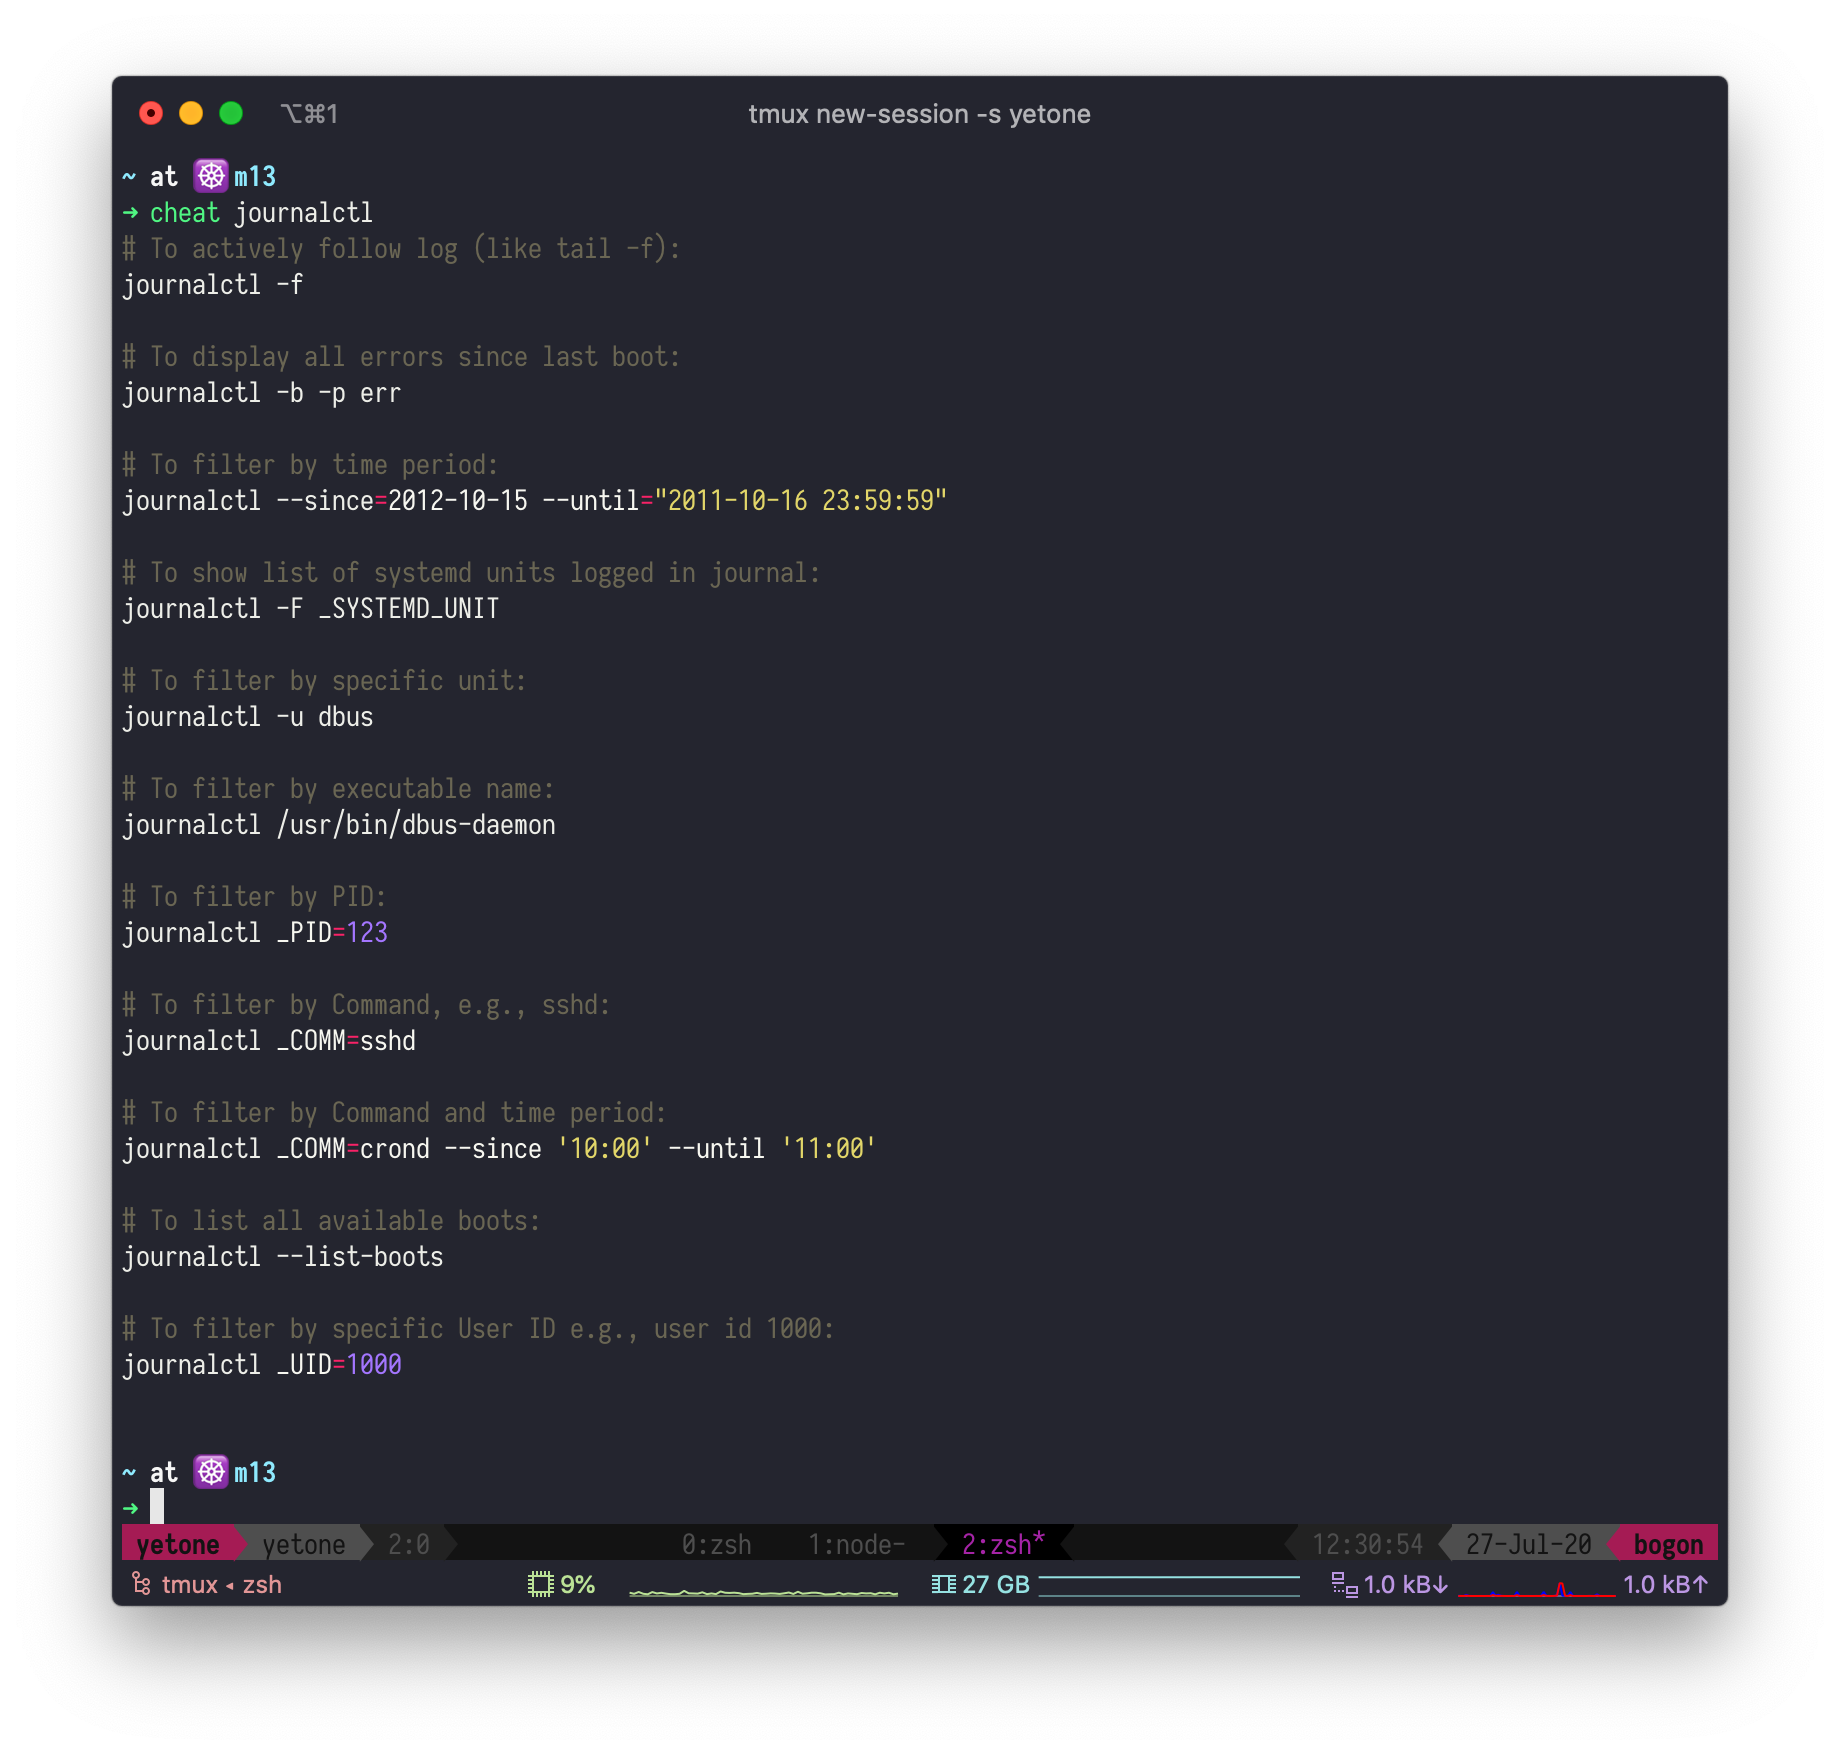
最近感觉 cheat 比 tldr 更好用啊
去这里下载解压并放在 PATH 下:https://github.com/cheat/cheat/releases
Contributor guide
No contributing guide indexed for this repository
Assessment
This issue has not been assessed yet.