meilisearch / meilisearch/documentation
Update disk performance docs: upgrades are now self-serve, add tier table + screenshots
@gillian-meilisearch is already working on this.
Since Sep 16, 2026.
- Dominant language
- MDX
- Stars
- 174
- Forks
- 276
- Avg merge
- 2d 1h
- Merged PRs (30d)
- 6
Description
Problem
The Pricing model page still says disk performance upgrades are Enterprise-only and require contacting sales. That is no longer true — disk performance is now a self-serve add-on that any project can upgrade directly from the Cloud dashboard.
Current text (capabilities/platform/billing/pricing_model.mdx, L19–21):
High Performance Disk (Enterprise)
Enterprise accounts can enable High Performance Disk on L tiers and above. It provides roughly 5x the IOPS and disk bandwidth of standard disk, which improves indexing throughput and search speed for disk-bound workloads. Contact sales@meilisearch.com to enable it.
Two things are wrong or missing:
- It routes users to sales for something they can now buy themselves in the dashboard.
- It gives no tier table — no IOPS, throughput, or prices — so users can't tell what they'd be buying.
Proposed update
Replace the section with the following (rename High Performance Disk (Enterprise) → Disk performance):
Disk performance
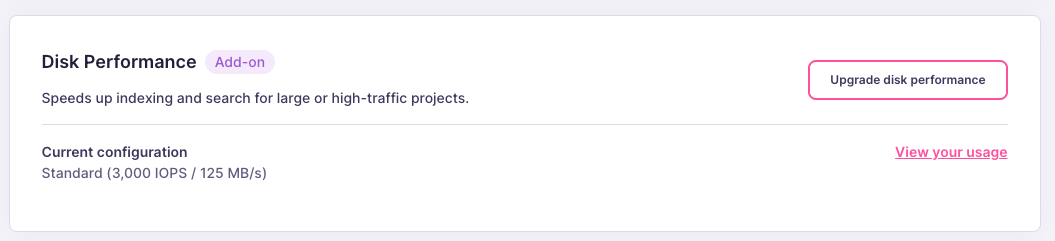
Every resource-based project includes Standard disk performance. If disk I/O is capping your indexing or search speed, you can upgrade your project's IOPS and throughput directly from your dashboard — no need to contact sales.
| Tier | IOPS | Throughput | Price |
|---|---|---|---|
| Standard | 3,000 | 125 MB/s | Included |
| High | 5,000 | 200 MB/s | $52/month |
| Extra | 10,000 | 300 MB/s | $168/month |
| Max | 15,000 | 1,000 MB/s | $380/month |
To upgrade, go to your project's Infrastructure tab and select Upgrade disk performance, then choose a tier.
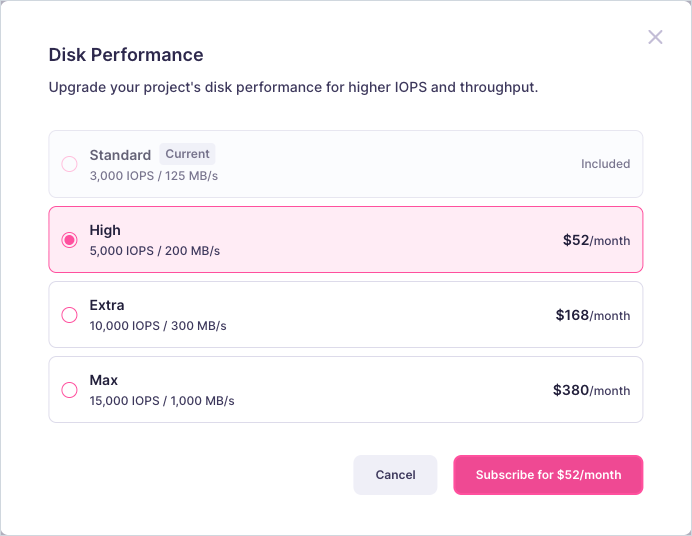
The IOPS Usage and Disk Throughput charts on the same tab show your current consumption against your tier limit. If you are regularly hitting the dashed tier-limit line, you are disk-bound and a higher tier will help.
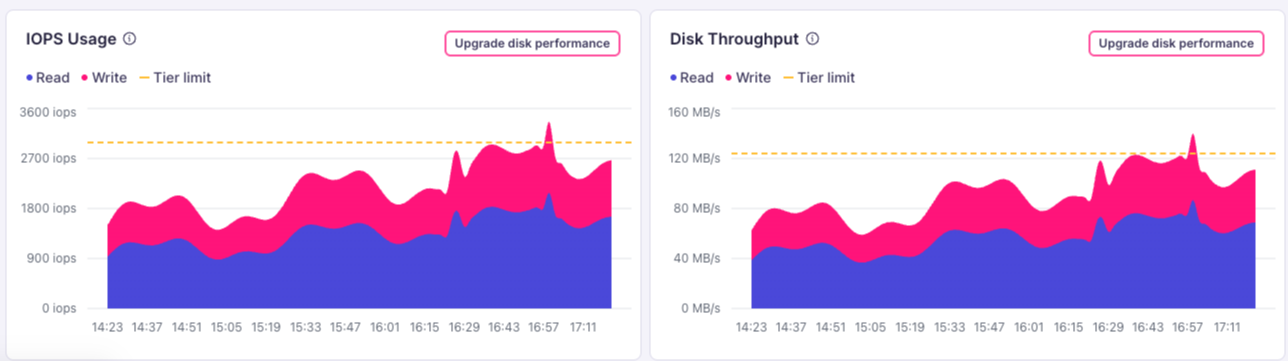
You can also manage the add-on from Project Settings → Disk Performance, which shows your current configuration.
Screenshot notes
- The three images above are cropped and ready to commit. Suggested path, matching the existing convention:
assets/images/platform/billing/. - The modal shot is cropped to the dialog itself — the raw capture had it overlaid on a dimmed Infrastructure tab, which reads badly in docs.
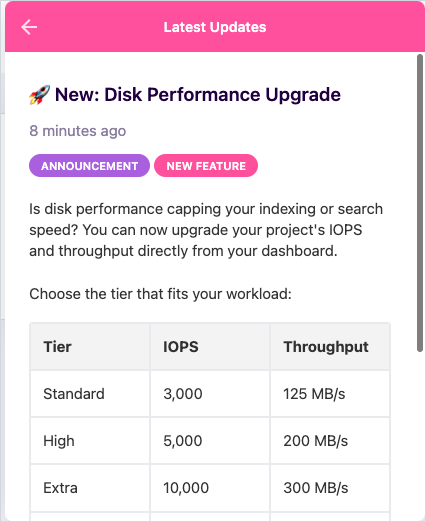
- Source of truth for the numbers is the in-app changelog announcement, included below for reference only. Not for the docs — the table is cut off mid-scroll, so the Max row isn't visible.
Changelog announcement (reference)
Questions for @qdequele
- Prices and tiers: the numbers above are transcribed from the dashboard on my project. Do they vary by region or resource tier, the way compute/disk pricing does? If so the table needs a "prices may vary by region" caveat like the one above it.
- Availability: does the old "L tiers and above" restriction still apply, or is the add-on available on every resource-based tier now? The modal didn't show any gating.
- Usage-based projects: is this add-on resource-based only, or does it apply to Build/Custom too?
- Is there anything left that still genuinely requires contacting sales here (e.g. above Max)?
Happy to open the PR once these are confirmed.
Scope
- Rewrite the section in
capabilities/platform/billing/pricing_model.mdx - Add the tier table
- Commit the three screenshots to
assets/images/platform/billing/ - Grep for other pages that point users to sales for disk performance
Contributor guide
First steps
- Read the whole issue, then the project's contributing guide.
- Comment on the issue to say you are picking it up — it saves two people doing the same work.
- Fork the repository and make your change on a branch.
- Open a pull request that references the issue number.
Assessment
This issue has not been assessed yet.