geerlingguy / geerlingguy/mini-rack
DIY Budget Mini-Rack with 2020 Aluminium Extrusion [Guide]
- Dominant language
- No language data
- Stars
- 3.9k
- Forks
- 102
- PR merge metrics
- No merged PRs in 30d
Description
Perfect for Home Labs – More at [darkrym.com](https://www.darkrym.com/)
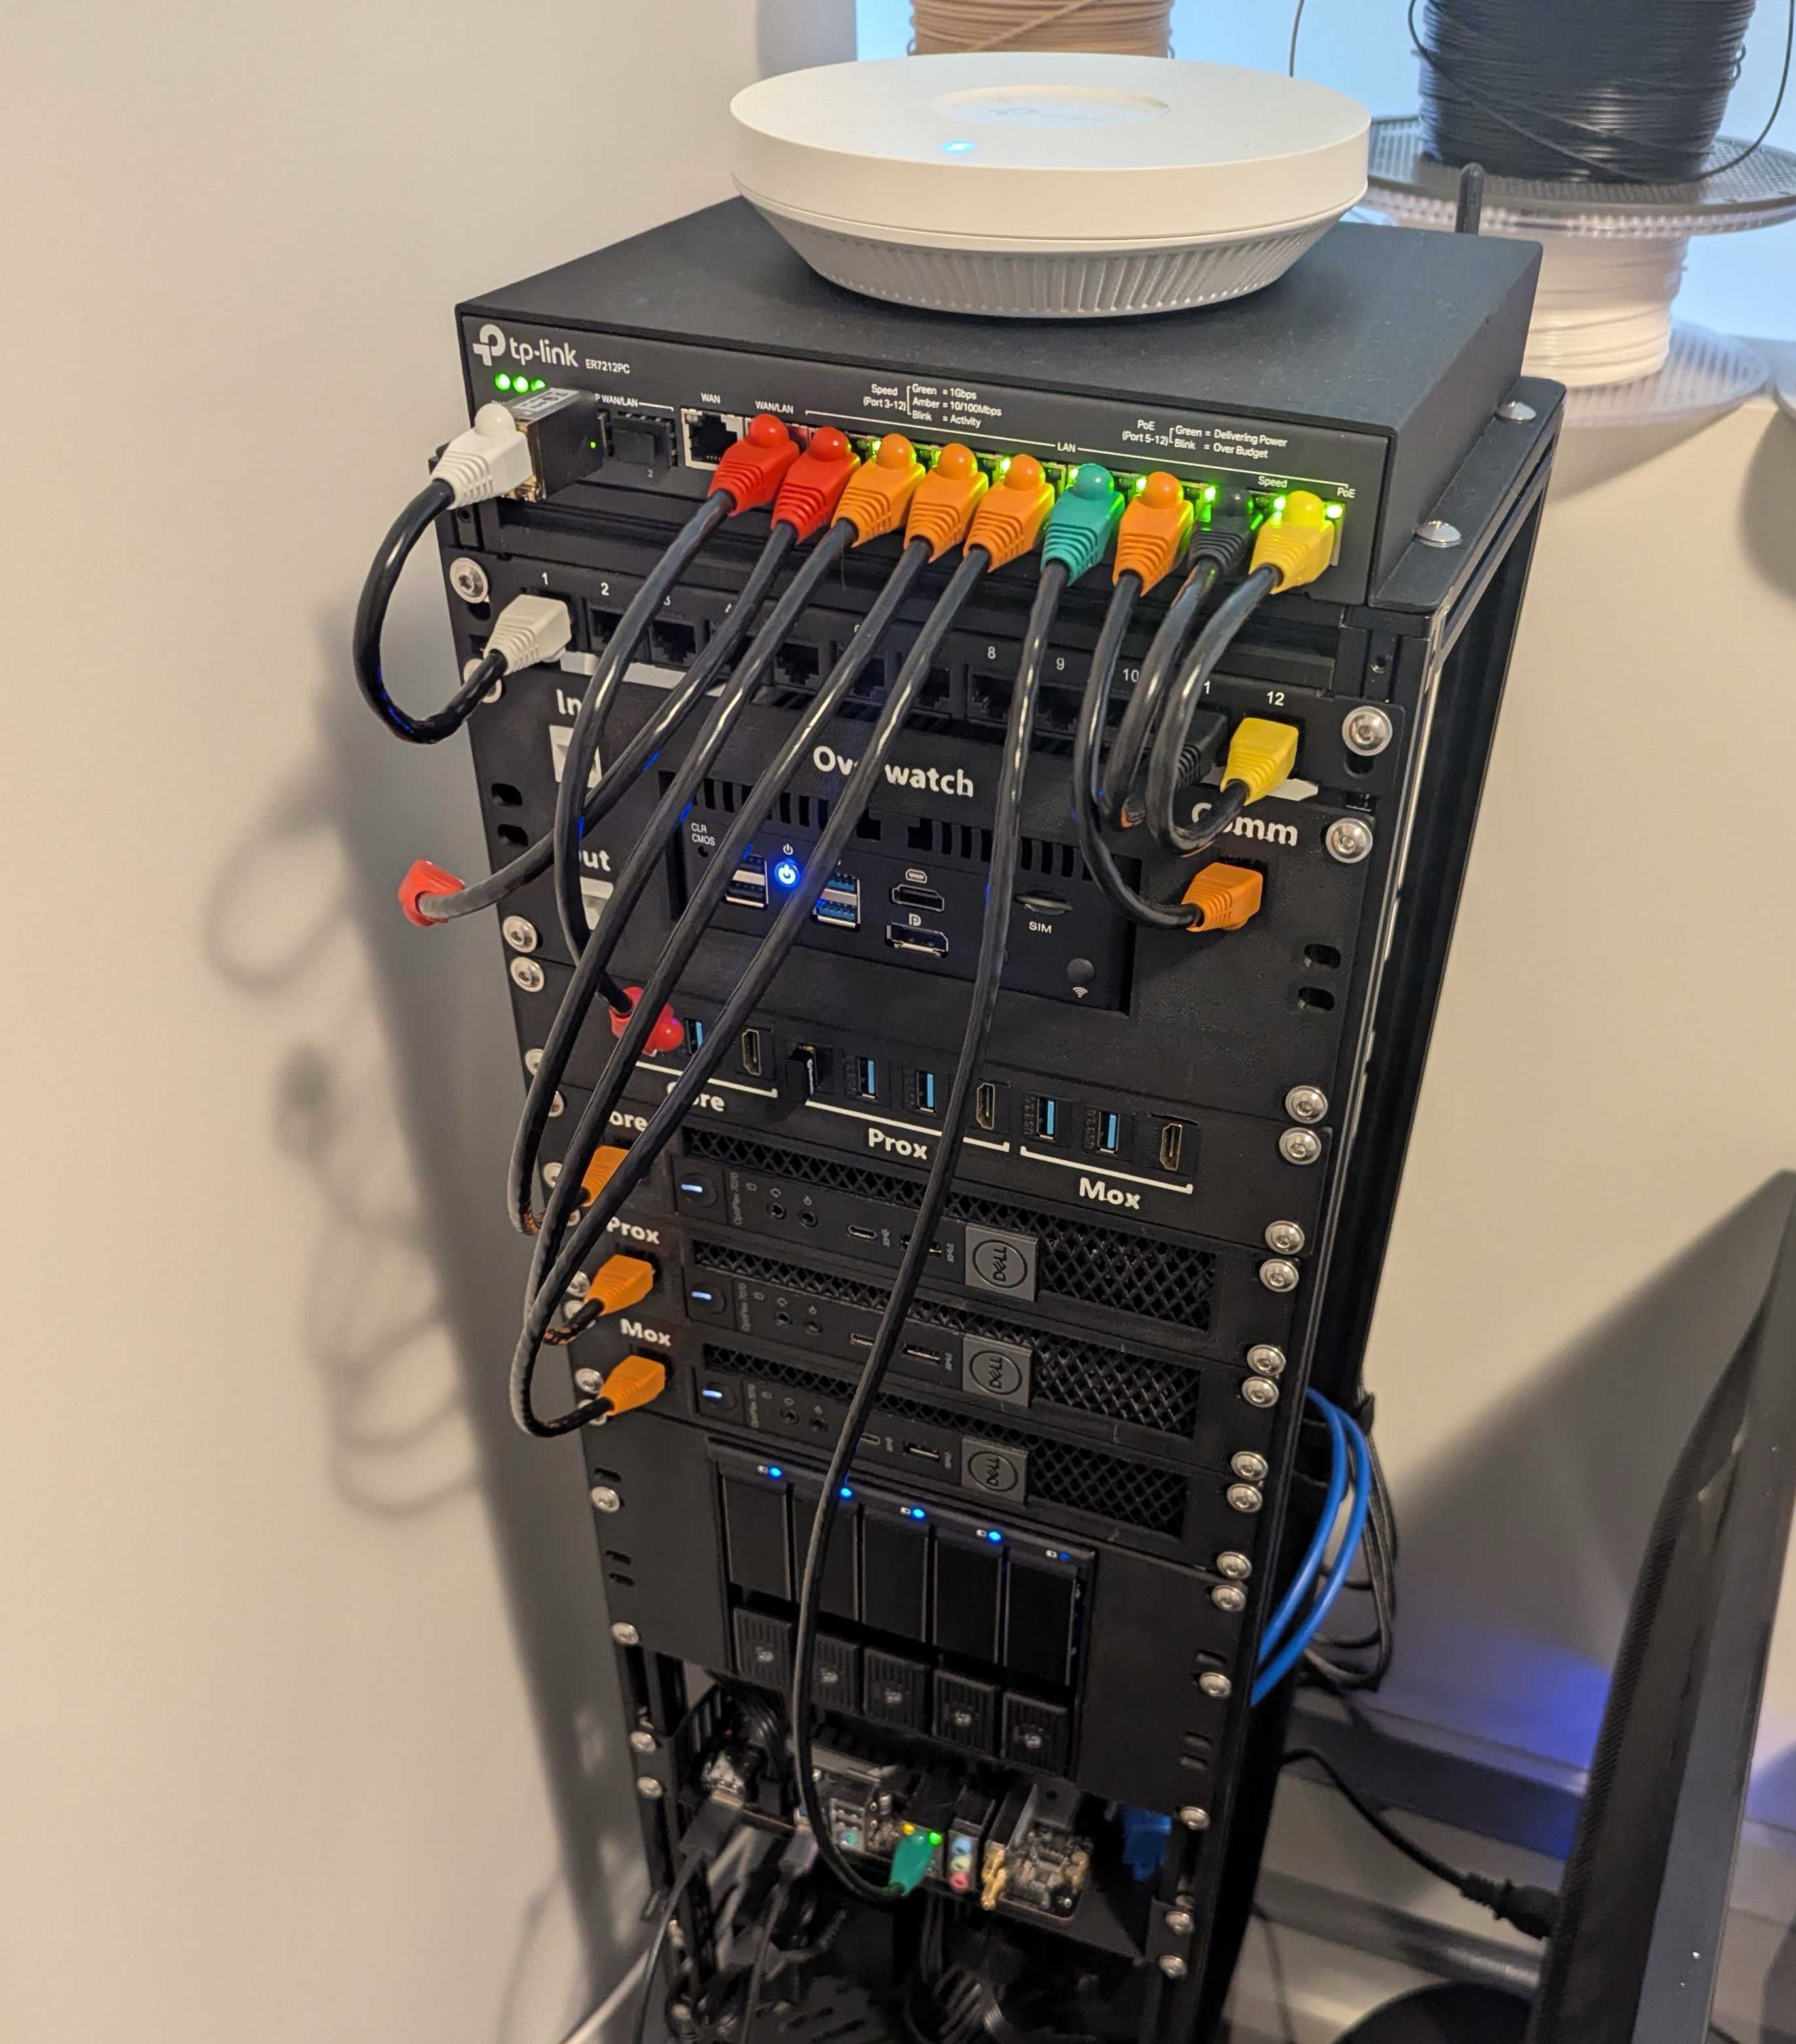
Build your own compact and modular mini server rack using 2020 aluminium extrusion. This guide will walk you through the parts, tools, and steps needed to assemble a rack suitable for home labs or networking gear.
---
## Parts List
(Links are Australian, but you get the idea!)
| Quantity | Item | Link |
| -------: | ---------------------------------------- | ------------------------------------------------------------------------------------------------------------------------------------------------------------------------------------------------------------- |
| 8x | 2020 Aluminium Extrusion – 800mm | [uxcell – Amazon AU](https://www.amazon.com.au/uxcell-Aluminum-Extrusion-European-Industrial/dp/B0CL8PT413) |
| 8x | 2020 Aluminium Extrusion Corner Brackets | [Amazon AU](https://www.amazon.com.au/Connector-European-Standard-Aluminum-Extrusion/dp/B08C9Q2TGW) |
| 50x | M5 Spring-Loaded T-Nuts | [Amazon AU](https://www.amazon.com.au/VGOL-European-Standard-Aluminum-Profiles/dp/B0CF1W222M?th=1) |
| 50x | M5 × 8mm Bolts | [Amazon AU](https://www.amazon.com.au/Socket-Screws-Flange-Stainless-Steel/dp/B0DJ8Q86JL) |
| 1x | Rack Shelf | [GeeekPi Shelf – Amazon AU](https://www.amazon.com.au/GeeekPi-DeskPi-RackMate-Accessories-Shell/dp/B0D66832BM/) |
| 1x | Mini ITX Mount | [GeeekPi Mount](https://www.amazon.com.au/GeeekPi-DeskPi-RackMate-Accessories-Shell/dp/B0D6B3V9H8/) or [Short Depth Rackmount](https://www.amazon.com/inch-Mini-ITX-Short-Depth-Rack-mountable/dp/B0BZS7K8FP) |
| 1x | Patch Panel | [GeeekPi Panel](https://www.amazon.com.au/GeeekPi-DeskPi-RackMate-Accessories-Network/dp/B0D6B29P9W) or [Printable Patch Panel](https://www.printables.com/model/1246812-10-inch-10-port-patch-panel) |
| 1x | Drive Bay Adapter | [SilverStone 5.25" to 3.5"](https://www.amazon.com.au/SilverStone-5-25in-3-5in-Chassis-Converter/dp/B0815G2S5G) + [Drive Bay Bracket - Thingiverse](https://www.thingiverse.com/thing:6859441) |
| 1x | Power Rail | [Printable 7-Port C13 Rail](https://www.printables.com/model/1235260-7-port-c13-power-rail-for-10-rack) |
| 3x | Dell OptiPlex 7070 | [eBay AU](https://www.ebay.com.au/itm/195582338787) + [Mount – Printables](https://www.printables.com/model/1225356-slim-dell-optiplex-mount-for-10-inch-rack-with-key) |
| *OR* 3x | HP ProDesk | [eBay AU](https://www.ebay.com.au/itm/266722511337) |
| Optional | Remote Management | [JetKVM](https://jetkvm.com/) |
---
## Tools Required
- Mitre saw (suitable for aluminium)
- Allen key set
- Measuring tape
- Marker or pencil
---
## Aluminium Extrusion Cut List
Measure and cut your 800mm 2020 extrusions down to:
- **4 × 160mm** – *Depth*
- **4 × 218mm** – *Width*
- **4 × Height**, calculated as:
`Height = (45mm × Desired Rack Units) + 40mm`
_e.g. for 6U: (45 × 6) + 40 = 310mm_
> Aluminium can be cut cleanly with a standard mitre saw.
---
## Assembly Instructions
### 1. **Assemble Frame**
- Form **top and bottom rectangles** with 2× width (218mm) and 2× depth (160mm) extrusions.
- Use the **corner brackets** to secure each corner.
- Attach the **vertical height extrusions** to the four corners of one rectangle, then attach the other rectangle to complete the frame.
### 2. **Insert Spring Nuts**
- Insert **M5 spring-loaded nuts** into the extrusion channels at an angle until they “click” into place.
- Slide them to the desired height to mount brackets, shelves, or other accessories.
### 3. **Install Components**
Mount your accessories using M5 × 8mm bolts and T-nuts:
- Rack shelves
- Mini ITX mount
- Drive bay
- Patch panel
- Power rail
- Custom mounts (e.g. for Dell 7070 or HP ProDesk)
### 4. **Optional Add-ons**
- Mount cooling fans or mesh panels to sides/back.
- Add rubber feet or small castors for mobility.
- Paint or vinyl-wrap the frame for aesthetics.
---
## Tips & Notes
- Keep **at least 2-3U free** for airflow and future additions.
- Preload extra spring nuts into the frame before full assembly to save time later.
- Cable management can be done using adhesive clips, zip ties, or printed brackets.
---
## My Racks Layout (16U Rack)
### Front
| Unit | Component |
| ---- | ---------------------- |
| 1U | Patch Panel (Ethernet) |
| 2U | Firewall |
| 1U | Patch Panel (Rear IO) |
| 3U | Dell 7070 x3 |
| 3U | HDD Drive Bay |
| 3U | Mini ITX or ProDesk |
### Rear
| Unit | Component |
| ---- | --------------------- |
| 1U | Patch Panel |
| 2U | Shelf (Power Supplys) |
| 1U | Power Rail |
Contributor guide
No contributing guide indexed for this repository
Assessment
This issue has not been assessed yet.